Tie Guide: A Comprehensive Overview (Updated 11/22/2025)
Navigating the world of neckwear can be daunting, but mastering tie-tying elevates your style significantly. This guide provides essential knowledge,
from basic knots to advanced techniques, ensuring you’re always sharply dressed and confident.
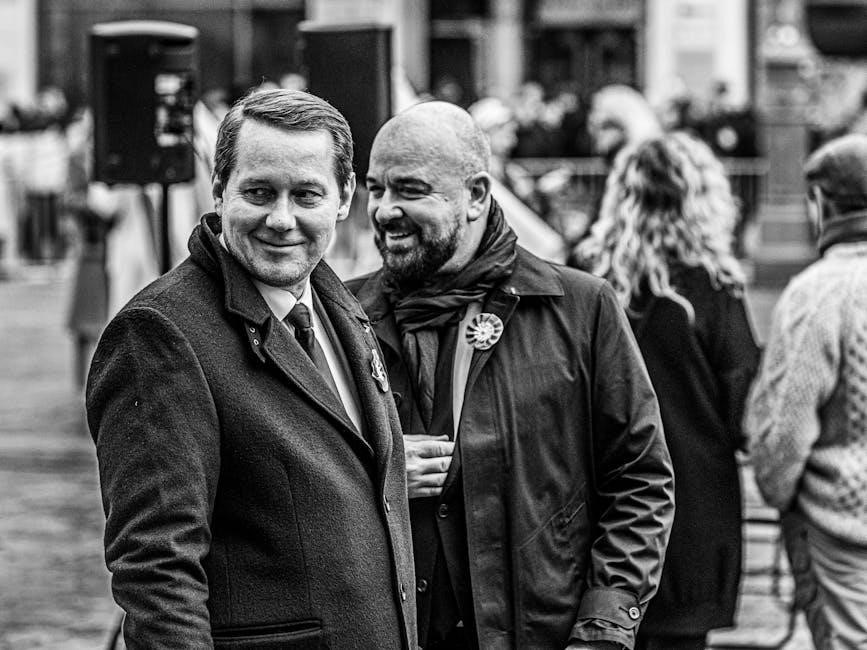
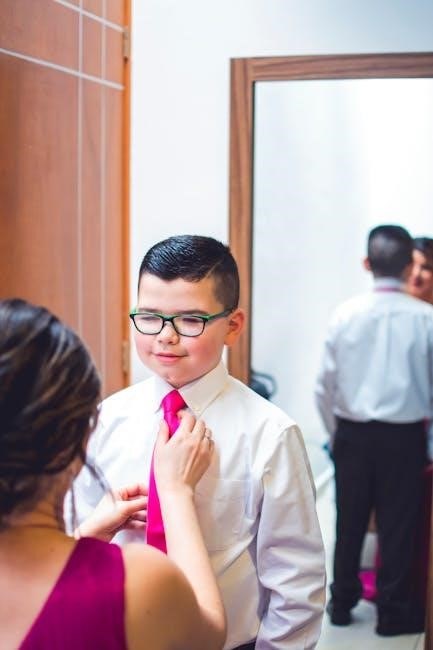
The ability to tie a tie is a rite of passage, a skill often first confronted in youth, yet continually refined throughout life. It’s a deceptively simple act, transforming a length of fabric into a symbol of sophistication and professionalism. However, many initially struggle, turning a routine morning preparation into a frustrating ordeal.
This guide aims to demystify the process, offering clear, concise instructions for a variety of knots. We’ll move beyond simply achieving a functional knot to understanding how different ties and knots complement various shirt collars and occasions. Learning to tie a tie isn’t merely about following steps; it’s about understanding the underlying principles of balance, symmetry, and proportion.
Ultimately, mastering this skill empowers you to present a polished and put-together appearance, conveying confidence and attention to detail. It’s a small detail that makes a significant impact, elevating your overall style from simply dressed to impeccably dressed.
Why Learning to Tie a Tie Matters
In a world increasingly leaning towards casual attire, the tie remains a powerful symbol of respect, professionalism, and attention to detail. Knowing how to tie one isn’t just about adhering to dress codes; it’s about demonstrating a commitment to presenting your best self.
A well-tied tie instantly elevates your appearance, conveying confidence and competence in professional settings like interviews, meetings, and formal events. It signals that you’ve taken the time and effort to present yourself thoughtfully. Beyond the professional realm, mastering tie-tying expands your stylistic options, allowing you to express your personality and refine your personal brand.
Furthermore, the ability to tie a tie is a practical life skill, offering a sense of self-reliance and accomplishment. It’s a small gesture that speaks volumes, demonstrating a level of sophistication and preparedness that sets you apart.
Essential Tie Anatomy
Understanding the components of a tie is crucial before attempting any knot. A tie isn’t simply a length of fabric; it’s carefully constructed with specific parts that influence its drape and overall appearance.
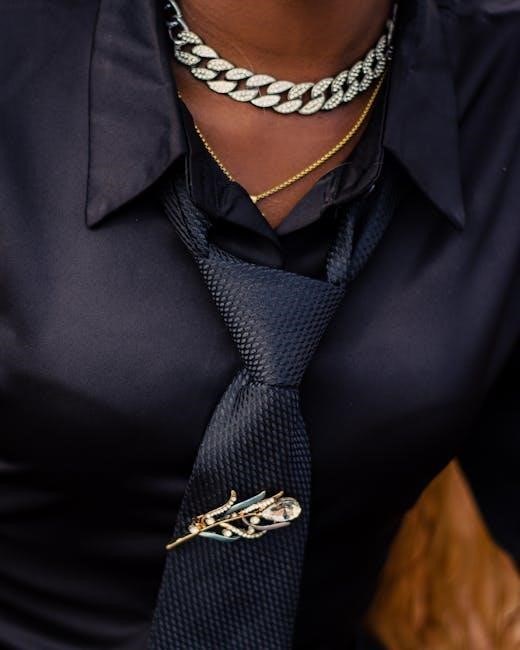
The blade is the wider end of the tie, typically the part that features a pattern or design. The tail is the narrower end, used for adjustments during the tying process. The interlining, often unseen, provides the tie’s shape and weight, impacting how well it holds a knot.

Beyond these core elements, consider the keeper loop, which secures the blade after tying, and the label, often discreetly placed on the tail. Recognizing these parts allows for greater control and precision when mastering different knots, ultimately leading to a polished and professional finish.
Understanding the Blade and Tail
The blade and tail are the fundamental working parts of any tie, dictating how easily and effectively a knot can be formed. The blade, being wider, is the active component initially manipulated to create the knot’s structure. Its length and pattern are visually prominent once tied, so selecting a tie with a blade that complements your shirt and suit is key.
Conversely, the tail is the narrower end, primarily used for adjustments and securing the knot. It’s typically hidden behind the blade, ensuring a clean and streamlined appearance. Mastering the interplay between these two ends – knowing how much blade to use and how to properly position the tail – is essential for achieving a balanced and proportionate knot.
The Importance of Tie Width
Tie width is a surprisingly impactful element of overall style, heavily influenced by current trends and personal proportions. Historically, wider ties were dominant, projecting an image of power and confidence. However, modern fashion has seen a shift towards slimmer silhouettes, offering a more contemporary and refined aesthetic.
Choosing the right width involves considering your lapel width – a general rule is to match them for visual harmony. A wider lapel pairs well with a wider tie, while a narrower lapel complements a slimmer tie. Furthermore, your body type plays a role; taller individuals can often pull off wider ties, while those of smaller stature may benefit from a narrower option. Ultimately, the goal is balance and a polished, intentional look.
Tie Materials: Silk, Wool, and More
The material of a tie significantly impacts its appearance, texture, and suitability for different occasions. Silk remains the most popular choice, prized for its luxurious sheen, smooth drape, and versatility. It’s appropriate for both formal and business settings, offering a classic and sophisticated look.
Wool ties, particularly those made from cashmere or merino, provide a more textured and substantial feel, ideal for autumn and winter. They convey a sense of understated elegance and are excellent for adding depth to an outfit. Beyond silk and wool, you’ll find ties crafted from linen, cotton, and even knit materials. Linen offers a relaxed, summery vibe, while cotton provides a more casual aesthetic. Exploring different materials allows you to express your personal style and adapt your tie selection to the season and event.

Popular Tie Knots: Step-by-Step Guides
Mastering a few key knots unlocks a world of sartorial possibilities. We’ll explore classic and modern options, providing clear, concise instructions for each tie knot.
The Four-in-Hand Knot: A Classic Choice
The Four-in-Hand is arguably the most popular tie knot, celebrated for its simplicity and versatility. It’s an excellent starting point for beginners, requiring minimal effort to achieve a respectable, slightly asymmetrical look. This knot is known for its narrow profile, making it suitable for most shirt collars and tie fabrics.
Its slightly uneven appearance lends a touch of understated elegance, avoiding the overly formal aesthetic of symmetrical knots. The Four-in-Hand is a go-to for everyday wear, business casual settings, and situations where a polished, yet relaxed, appearance is desired. Learning this knot is a foundational step in any man’s sartorial journey, offering a quick and reliable solution for looking impeccably dressed.
Four-in-Hand Knot: Instructions
Begin with the wide end of the tie extending about twelve inches lower than the narrow end. Cross the wide end over the narrow end, forming an ‘X’ just below your chin. Bring the wide end up and behind the narrow end. Then, pass the wide end across the front of the narrow end, from right to left.
Next, bring the wide end up and through the loop around your neck from underneath. Finally, hold the narrow end and slide the knot up to your collar, adjusting as needed. A slight dimple can be created by gently pinching the tie below the knot as you tighten it. Practice makes perfect – don’t be discouraged if it takes a few attempts to achieve a neat and balanced knot!
Four-in-Hand Knot: Best for Which Collars?
The Four-in-Hand knot’s slightly asymmetrical and slender profile makes it exceptionally versatile, pairing beautifully with a wide range of collar styles. It’s particularly well-suited for button-down collars, offering a relaxed yet refined aesthetic. This knot also complements narrow spread collars, creating a balanced proportion without overwhelming the face;
Furthermore, the Four-in-Hand works wonderfully with point collars, providing a classic and understated look. Avoid using it with very wide spread collars, as the knot may appear disproportionately small. Its simplicity makes it ideal for everyday wear and business casual settings, offering a polished appearance without excessive formality. Ultimately, the Four-in-Hand is a reliable choice for most shirt collars, ensuring a consistently stylish outcome.
The Half Windsor Knot: Versatility and Symmetry
The Half Windsor knot strikes an excellent balance between size and complexity, making it a remarkably versatile choice for various occasions and collar types. It’s larger and more symmetrical than the Four-in-Hand, yet not as bulky as the Full Windsor, offering a refined and professional appearance. This knot is considered a ‘middle-ground’ option, suitable for both business and semi-formal events.
Its symmetrical shape lends itself well to spread collars and cutaway collars, filling the space nicely without appearing overly imposing. The Half Windsor also works effectively with point collars, adding a touch of sophistication. It’s a fantastic option when you want a polished look that isn’t excessively formal, demonstrating attention to detail and style. Mastering this knot provides a significant boost to your tie-tying repertoire.
Half Windsor Knot: Instructions
Begin with the wide end of the tie extending about 12 inches lower than the narrow end. Cross the wide end over the narrow end, then bring it up and behind the loop around your neck. Bring the wide end down and over the front of the knot.
Pass the wide end up and through the loop around your neck again, this time from underneath. Bring the wide end down and across the front of the knot, forming a horizontal band. Finally, pass the wide end up and through the loop you’ve just created in the front of the knot. Gently tighten the knot by holding the narrow end and sliding the knot up to your collar. Adjust for symmetry and a neat dimple.
Half Windsor Knot: Suitable Occasions
The Half Windsor knot strikes a perfect balance between formality and approachability, making it incredibly versatile. It’s an excellent choice for business settings, interviews, and client meetings, projecting competence and attention to detail without appearing overly ostentatious.
This knot also works wonderfully for weddings and semi-formal events, pairing well with a variety of suit colors and shirt styles. It’s sophisticated enough for important occasions, yet relaxed enough for everyday professional wear. The Half Windsor complements medium-spread and spread collars beautifully, offering a symmetrical and polished look. Avoid it with very narrow collars, as the knot’s size might overwhelm them. It’s a reliable knot for almost any situation requiring a refined appearance.
The Full Windsor Knot: Formal and Bold
The Full Windsor knot is the epitome of formal neckwear, renowned for its symmetrical, triangular shape and substantial size. This knot commands attention and exudes confidence, making it ideal for the most important occasions. Think high-profile business events, black-tie affairs, and significant presentations where a powerful impression is crucial.
However, its boldness requires careful consideration. The Full Windsor is best suited for wider spread collars – think cutaway or Windsor collars – to accommodate its volume. It pairs exceptionally well with solid or subtly patterned ties in luxurious fabrics like silk. Avoid using it with busy patterns or thinner ties, as it can appear disproportionate. Mastering this knot demonstrates a commitment to classic style and refined elegance, but it’s a statement knot, best reserved for moments where you want to make one.
Full Windsor Knot: Instructions
Begin with the wide end of the tie extending approximately 12 inches lower than the narrow end. Cross the wide end over the narrow end, then bring it up and behind the loop around your neck. Bring the wide end down and across the front, forming a horizontal band.
Pass the wide end up and behind the loop again, this time on the opposite side. Bring it down across the front, mirroring the previous step. Now, bring the wide end up and over the knot, then pass it down through the loop you’ve created in front. Finally, hold the narrow end and gently slide the knot up to your collar, adjusting for tightness and symmetry. Practice is key to achieving a perfectly balanced and polished Full Windsor!

Full Windsor Knot: When to Use It
The Full Windsor knot is the epitome of formal neckwear, best reserved for occasions demanding a powerful and sophisticated impression. Think important business meetings, high-profile events, weddings, and any situation where projecting authority and confidence is paramount.
Due to its substantial size and symmetrical shape, it pairs exceptionally well with spread collar shirts – those with wider angles – allowing ample space for the knot to sit comfortably. Avoid using it with narrow collar shirts, as it can appear disproportionately large. The Full Windsor also complements heavier weight tie fabrics, maintaining its structure and visual impact. It’s a statement knot, so choose wisely and wear it with assurance!
The Pratt Knot (Shelby Knot): A Modern Option
The Pratt Knot, also known as the Shelby Knot, offers a balanced aesthetic – neither overly bulky nor too slim – making it a versatile choice for the modern gentleman. It’s a fantastic alternative to the more traditional knots, providing a refined and contemporary look suitable for a wide range of settings.
This knot is known for its symmetrical appearance and moderate size, making it adaptable to various collar styles and tie fabrics. It works particularly well with medium-weight ties and spread or point collars. The Pratt Knot is slightly more complex than the Four-in-Hand but easier than the Windsor knots, offering a good balance between style and simplicity. It’s a reliable knot for both professional and social occasions, demonstrating a subtle sophistication.
Pratt Knot: Instructions

Begin with the tie reversed, seam-side out, and the wide end extending about 12 inches lower than the narrow end. Cross the wide end under the narrow end. Bring the wide end up and over the loop around your neck.
Now, bring the wide end down and through the knot in front. Hold the knot loosely and adjust it by sliding the knot up to your collar. Ensure the dimple is formed by gently pinching the tie just below the knot as you tighten. The resulting knot should be symmetrical and neatly proportioned. Practice makes perfect – don’t be discouraged if it takes a few attempts to achieve a clean, polished Pratt Knot. Remember to adjust the length as needed for a perfect fit.
Pratt Knot: Advantages and Disadvantages
The Pratt Knot, also known as the Shelby Knot, offers a balanced aesthetic – neither too bulky nor too small. Its medium size makes it incredibly versatile, suitable for a wide range of shirt collars and tie fabrics. A key advantage is its symmetrical appearance, providing a polished and professional look with relative ease of tying.
However, the Pratt Knot isn’t without its drawbacks. It consumes slightly more tie length than simpler knots like the Four-in-Hand, potentially posing a challenge for shorter ties or taller individuals. Some find the initial reversed starting position counterintuitive. While generally adaptable, very thick tie materials might result in an overly large knot. Ultimately, the Pratt Knot is a solid choice for those seeking a refined, modern knot with moderate complexity.

Advanced Tie Knots & Techniques
For those seeking to truly stand out, explore intricate knots like the Eldredge, Trinity, and Van Wijk. These demonstrate skill and add flair!
The Eldredge Knot: For the Fashion-Forward
The Eldredge Knot is a visually striking and complex tie knot, favored by those who wish to make a bold fashion statement. Unlike traditional knots that utilize the tie’s blade as the active end, the Eldredge primarily employs the narrow end to create its unique, tapered shape. This results in a knot with a distinctive, braided appearance, often described as resembling a series of interwoven strands.
It’s important to note that the Eldredge Knot consumes a significant amount of tie length, making it best suited for longer ties or individuals who prefer a shorter overall tie length. Mastering this knot requires patience and practice, as it involves several intricate steps and precise movements. However, the resulting aesthetic is undeniably impressive, showcasing a level of sophistication and attention to detail that sets it apart from more conventional tie knots. It’s a fantastic choice for events where you want to express your personality and demonstrate a refined sense of style.
The Trinity Knot: A Complex and Eye-Catching Knot
The Trinity Knot is renowned for its intricate, triangular shape, resembling a three-pointed Celtic knot – hence its name. This knot is a true showstopper, demanding attention and signaling a confident, fashion-conscious individual. It’s considerably more challenging to tie than simpler knots like the Four-in-Hand or Half Windsor, requiring a methodical approach and a good understanding of tie manipulation.
Like the Eldredge, the Trinity Knot utilizes a significant portion of the tie’s length, so a longer tie is recommended. The finished knot is symmetrical and substantial, making it best paired with spread or cutaway collar shirts to provide adequate space. While not appropriate for every occasion – it leans towards the formal and expressive – the Trinity Knot is perfect for events where you want to stand out and demonstrate a mastery of sartorial skill. Practice is key to achieving a clean, balanced, and visually stunning Trinity Knot.
The Van Wijk Knot: Asymmetrical Elegance
The Van Wijk Knot presents a sophisticated and distinctive alternative to traditional symmetrical tie knots. Characterized by its unique, slightly askew appearance, it exudes a subtle confidence and refined taste. This knot achieves its asymmetrical form through a clever manipulation of the tie’s fabric, creating a visually interesting and modern aesthetic.
It’s considered an intermediate-level knot, requiring a bit more dexterity than a Four-in-Hand but less complexity than a Trinity Knot. The Van Wijk works exceptionally well with solid or subtly patterned ties, allowing the knot’s structure to take center stage. Pair it with a spread collar shirt to best showcase its shape. While versatile enough for business settings, it truly shines in social situations where a touch of individuality is desired. Mastering the Van Wijk Knot demonstrates a willingness to explore beyond the conventional, adding a unique flair to your overall style.

Tie Etiquette and Styling
Proper tie etiquette and styling are crucial for a polished appearance. Coordinating colors, achieving the correct length, and mastering the dimple demonstrate attention to detail and sophistication.
Matching Ties to Shirts and Suits
Achieving a harmonious look hinges on thoughtfully matching your tie to your shirt and suit. Generally, your tie should complement, not precisely match, your shirt. A good rule of thumb is to choose a tie with a color present in your shirt’s pattern, or one that provides a pleasing contrast.
With suits, consider the fabric and color. Navy suits are incredibly versatile, pairing well with burgundy, gold, or patterned ties. Gray suits offer even more flexibility, accommodating a wider range of colors and patterns. Black suits demand more formal ties – silver or darker shades are ideal.
Avoid overly busy combinations; if your shirt has a bold pattern, opt for a simpler tie, and vice versa. Pay attention to the occasion; brighter, more playful ties are suitable for less formal settings, while subdued tones are best for professional environments. Ultimately, confidence is key – choose combinations that make you feel polished and put-together.
Tie Length: The Golden Rule

Proper tie length is paramount for a polished appearance; a tie that’s too short or too long detracts from your overall style. The universally accepted “golden rule” dictates that your tie should reach your belt buckle, or slightly cover it. This ensures a proportionate and aesthetically pleasing look.
For taller individuals, consider ties specifically designed for extra length. Conversely, those of shorter stature may need to adjust their knot or explore shorter tie options. The goal is to achieve that perfect endpoint – not hanging above the belt, nor dipping below it.
Pay attention to the knot you choose, as different knots consume varying amounts of tie length. A larger knot, like a Full Windsor, will naturally shorten the tie, while a smaller knot, like a Four-in-Hand, will leave more length. Regularly check your tie length in a full-length mirror to ensure it consistently adheres to the golden rule.
Tie Dimple: Creating a Professional Look
The tie dimple – that subtle indentation just below the knot – is a hallmark of sophisticated style and attention to detail. It elevates a simple tie from functional to fashionable, signaling a refined sense of dress. Creating a dimple isn’t about luck; it’s a technique that requires a bit of practice.
As you tighten your knot, gently pinch the tie just below the knot with your index finger and thumb. This creates the initial dimple. Continue tightening while maintaining the pinch, and then carefully adjust the dimple to your liking. Different materials will hold a dimple differently; silk generally forms a cleaner dimple than wool.
Don’t be afraid to experiment! A perfectly formed dimple adds depth and character to your tie, demonstrating a commitment to polished presentation. It’s a small detail that makes a significant impact on your overall professional image.
Caring for Your Ties: Cleaning and Storage
Proper tie care extends the life of your investment and maintains its appearance. Unlike frequently worn garments, ties don’t require frequent washing, which can damage the delicate fibers. Spot cleaning is usually sufficient for minor stains; gently blot with a damp cloth, avoiding harsh chemicals.
For more significant cleaning, professional dry cleaning is recommended, specifying the tie’s material. Crucially, avoid ironing ties directly. Instead, use a steamer to remove wrinkles, or gently iron on the lowest setting with a pressing cloth.
Storage is equally important. Never store ties rolled up, as this creates permanent creases. Instead, hang them on a tie rack or carefully fold them and store them flat. Allowing ample space prevents crushing and preserves the tie’s shape for years to come.