
Cuisinart Ice Cream Maker Instructions: A Comprehensive Guide
Discover effortless homemade frozen desserts! This guide provides detailed instructions for Cuisinart ice cream makers, covering operation, recipes, and troubleshooting for delightful results.
Understanding Your Cuisinart Ice Cream Maker Model
Cuisinart offers a range of ice cream makers, notably the ICE-20 and ICE-45 series. The ICE-20 is a classic, automatic frozen yogurt, ice cream, and sorbet maker, while the ICE-45, a “Mix It In” model, allows for easy addition of mix-ins during the freezing process.
Before beginning, identify your specific model. Online manuals are readily available at the Cuisinart website (www.cuisinart.com) and sites like ManualsLib. Knowing your model ensures you’re following the correct instructions, as features and operation can vary. Familiarize yourself with the components and their functions to maximize your ice cream-making experience. Proper model identification is crucial for safe and effective use.
Safety Precautions Before First Use
Prior to your first use, carefully review all instructions to avoid appliance damage and ensure safe operation. Always ensure the mixing paddle and lid are securely in place before operation – this is a critical safety measure. Avoid immersing the motor base in water or any other liquid.
Never operate the ice cream maker if the power cord or plug is damaged. Supervise children when the appliance is in use. Disconnect the unit from the power outlet when not in use and before cleaning. Proper handling and adherence to these precautions will guarantee a safe and enjoyable ice cream-making experience.
Component Identification: Parts List
Your Cuisinart ice cream maker includes several key components. These typically consist of a motor base, a double-insulated freezing bowl, a mixing paddle, a lid with ingredient spout, and a user instruction/recipe booklet. The ICE-45PK model features a ‘Mix It In’ design, allowing for easy addition of mix-ins during operation.
Familiarize yourself with each part before assembly. The freezing bowl requires pre-freezing for optimal results. The mixing paddle facilitates consistent churning. Ensure all parts are clean and undamaged before each use. Refer to the manual for detailed diagrams and part numbers for easy identification and potential replacement.
Preparing the Freezing Bowl
Proper freezing of the bowl is crucial for successful ice cream making. The bowl must be thoroughly frozen for at least 16-24 hours before use. Ensure it’s placed in a freezer compartment where it won’t thaw during the freezing period. Avoid fast-freezing settings, as they may not achieve sufficient chilling.
Before assembly, verify the bowl is completely frozen – liquid should not slosh around inside. A fully frozen bowl is essential for the mixture to solidify correctly. If the bowl isn’t adequately frozen, the ice cream won’t reach the desired consistency. Re-freeze if necessary, allowing ample time for complete solidification.
Mixing Paddle Installation and Function
The mixing paddle is vital for creating smooth, creamy ice cream. Before pouring the mixture, securely install the paddle into the frozen bowl. Ensure it clicks into place; it’s driven by a motor during operation. The paddle continuously scrapes the frozen bowl’s sides, incorporating air and preventing large ice crystals from forming.
The paddle’s rotation is essential for achieving the correct texture. Always confirm the paddle is correctly positioned and the lid is securely locked before starting the machine. Do not operate without these components in place, as it could damage the unit. The paddle’s consistent movement ensures even freezing.

Making Basic Ice Cream: Step-by-Step Instructions
Follow these simple steps to create delicious homemade ice cream! Prepare your mixture, pour it into the frozen bowl, and let the machine work its magic.
Recipe Considerations: Ingredients and Proportions
Achieving the perfect ice cream texture relies heavily on ingredient quality and precise proportions. A standard base typically includes heavy cream, milk, sugar, and flavorings. The fat content of the cream significantly impacts richness; higher fat yields a smoother result.
Sugar not only sweetens but also lowers the freezing point, preventing an overly icy consistency. Experiment with different sugars – granulated, powdered, or even corn syrup – to adjust texture.
Flavorings, like vanilla extract or fruit purees, should be added judiciously. Remember nutritional information varies; a chocolate sauce recipe boasts 330 calories, while a basic recipe contains 222. Proportions are key: too much liquid results in a grainy texture, while insufficient sugar leads to hardness. Refer to included recipe booklets for guidance!
Pouring the Mixture into the Freezing Bowl
Ensure the freezing bowl is thoroughly chilled – ideally, at least 24 hours in the freezer is recommended for optimal performance. Carefully pour the ice cream mixture into the frozen bowl, being mindful not to overfill. Leave at least one inch of headspace, as the mixture will expand during churning.
Overfilling can strain the motor and prevent proper freezing. Secure the lid firmly onto the bowl, ensuring the mixing paddle is correctly installed and locked into place.
Double-check that both the lid and paddle are securely positioned before initiating the mixing process; this prevents spills and ensures efficient operation, as noted in Cuisinart’s documentation.
The Mixing Process: Operation and Duration
Plug in your Cuisinart ice cream maker and select the appropriate mixing speed – typically a single “on” setting. The machine will begin to churn the mixture, gradually thickening it into ice cream. Allow the machine to operate for approximately 20-30 minutes, or until the mixture reaches a soft-serve consistency.
The duration can vary depending on the recipe, ambient temperature, and the initial temperature of the freezing bowl. Avoid interrupting the process prematurely, as this may result in a grainy texture.
Refer to your model’s manual (ICE-20 or ICE-45) for specific guidance, ensuring the paddle continues rotating throughout the entire cycle.

Advanced Techniques & Recipes
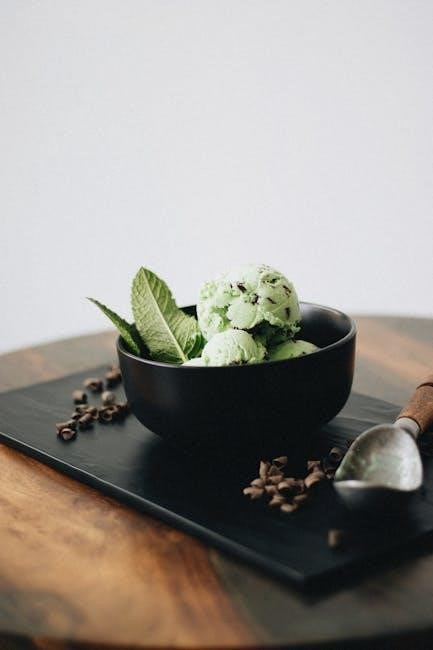
Explore beyond basic flavors! Create soft-serve, frozen yogurt, or sorbet, and enhance your creations with delicious mix-ins like chocolate and fruit.
Creating Soft-Serve Ice Cream
Achieving a perfect soft-serve consistency with your Cuisinart ice cream maker requires a slightly adjusted approach; The key lies in the mixture’s composition and the timing of the freezing process. Ensure your base is well-chilled before pouring it into the frozen bowl.
For optimal results, use a recipe specifically designed for soft-serve, as these typically contain ingredients that promote a smoother, less dense texture. The ICE-45 model, with its “Mix It In” feature, is particularly well-suited for creating soft-serve, allowing you to add mix-ins during the final minutes of churning.
Monitor the ice cream’s consistency closely; it should resemble a thick, creamy ribbon. Avoid over-churning, as this can lead to a harder, more traditional ice cream texture. Serve immediately for the best soft-serve experience!
Making Frozen Yogurt and Sorbet
Cuisinart ice cream makers are incredibly versatile, extending beyond traditional ice cream to delicious frozen yogurt and refreshing sorbet. For frozen yogurt, use a base with a higher milkfat content than for sorbet, ensuring a creamy texture. Greek yogurt works exceptionally well, providing tanginess and thickness.
Sorbet, being dairy-free, relies on fruit purees and sugar for its structure. A simple syrup base is often recommended for optimal freezing. Remember that sorbet mixtures tend to expand during freezing, so avoid overfilling the bowl.
The freezing time may vary slightly compared to ice cream; monitor the consistency closely. Both frozen yogurt and sorbet benefit from a brief softening period before serving for a smoother texture.
Adding Mix-Ins: Chocolate, Fruit, and More
Enhance your homemade creations with delightful mix-ins! Cuisinart ice cream makers allow for easy incorporation of chocolate chips, fruit pieces, nuts, and candies. It’s crucial to add these during the last few minutes of the churning process – typically the final 5-10 minutes – to prevent them from sinking to the bottom or becoming overly crushed.
For larger pieces, like chunks of cookies or brownies, a slightly longer addition time is acceptable. Ensure mix-ins are frozen or chilled beforehand to maintain the ice cream’s temperature.
Avoid adding liquid mix-ins directly, as they can disrupt the freezing process. Consider pre-coating them in a bit of cornstarch to help them suspend better.
Troubleshooting Common Issues
Resolve typical problems like improper freezing or motor stalling with our guide! We’ll cover grainy textures and offer solutions for perfect results every time;
Ice Cream Not Freezing Properly
If your ice cream mixture isn’t freezing, first ensure the freezing bowl was thoroughly frozen for at least 16-24 hours. Confirm it’s level in the freezer and hasn’t been disturbed. A partially thawed bowl is a common culprit!
Next, verify the mixing paddle and lid are securely in place; the machine won’t operate correctly without them. Ensure the mixture isn’t too warm – chill it in the refrigerator before pouring into the bowl.
Also, avoid overfilling the bowl, leaving enough space for expansion during churning. Finally, check the ambient temperature; very warm rooms can hinder the freezing process. If issues persist, re-freeze the bowl completely and try again.
Motor Stalling During Operation
A stalling motor often indicates the mixture is too thick or frozen, creating excessive resistance. Immediately unplug the unit! Allow the mixture to soften slightly before attempting to restart. Avoid using overly dense recipes or adding too many mix-ins at once.
Ensure the mixture isn’t overfilled, as this strains the motor. Verify the freezing bowl is properly seated and the paddle is correctly installed and rotating freely. Check for any obstructions hindering the paddle’s movement.
If stalling continues, let the machine rest for a few minutes to allow the motor to cool down before trying again. Consistent stalling may indicate a potential mechanical issue requiring service.
Dealing with a Grainy Texture
A grainy texture in your homemade ice cream usually stems from ice crystal formation, often due to slow freezing or ingredient imbalances. Ensure the freezing bowl is thoroughly frozen – at least 24 hours is recommended. Using high-fat content ingredients, like heavy cream, helps minimize ice crystal development.

Properly dissolving sugar is crucial; undissolved sugar contributes to graininess. Avoid over-churning, as prolonged mixing can also encourage ice crystal growth. Stabilizers, like a small amount of corn syrup, can improve texture.
If graininess occurs, briefly re-churn the ice cream after allowing it to soften slightly, which can help break up the crystals.

Cleaning and Maintenance
Maintain your Cuisinart ice cream maker with easy disassembly and proper cleaning procedures for lasting performance and delicious frozen treats every time!
Disassembling for Cleaning
Before cleaning your Cuisinart ice cream maker, always unplug it from the electrical outlet. Carefully remove the lid and the mixing paddle. The freezing bowl can be quite cold, so handle it with care. Detach the dasher assembly (paddle) from the motor shaft by gently twisting and lifting upwards. Ensure all components are separated before proceeding to washing.
Note that the freezing bowl is not dishwasher safe; it requires handwashing. The lid, mixing paddle, and dasher assembly can typically be washed on the top rack of your dishwasher, or handwashed with warm, soapy water. Always refer to your specific model’s manual for detailed disassembly instructions, as slight variations may exist between different Cuisinart ice cream maker models.
Proper Cleaning Procedures
Wash all removable parts – lid, mixing paddle, and dasher assembly – in warm, soapy water after each use. Rinse thoroughly and allow to air dry completely. Never immerse the motor base in water or any other liquid. Wipe it clean with a damp cloth. The freezing bowl requires gentle handwashing; avoid abrasive cleaners that could damage its surface.
For stubborn residue, soak the parts in warm, soapy water for a short period before washing. Ensure no soap remains, as it can affect the taste of future batches. Dry all components thoroughly before reassembling and storing. Regular cleaning prevents buildup and ensures optimal performance and longevity of your Cuisinart ice cream maker.
Storage Instructions
Before storing your Cuisinart ice cream maker, ensure all parts are completely clean and dry. The freezing bowl must be thoroughly dried to prevent freezer burn or damage. Store the bowl in a freezer-safe bag or wrapped securely to avoid absorbing odors. The motor base, lid, and paddle can be stored in a cool, dry place, away from direct sunlight.
Avoid stacking heavy items on top of the motor base. Proper storage extends the life of your appliance. If storing for an extended period, consider placing a desiccant packet with the freezing bowl to absorb any residual moisture. Regular use and careful storage will keep your Cuisinart maker functioning optimally.

Cuisinart ICE-20 & ICE-45 Model Specifics
Explore key differences between ICE-20 and ICE-45, including features and functionalities. Access online manuals and support resources for both models easily.
Comparing ICE-20 and ICE-45 Features
Both the Cuisinart ICE-20 and ICE-45 are excellent choices for homemade frozen treats, but they cater to slightly different preferences. The ICE-20, a classic model, focuses on traditional batch freezing, requiring pre-frozen bowls for optimal results. It’s known for its simplicity and reliability, offering a straightforward ice cream-making experience.
The ICE-45, however, introduces the “Mix It In” feature, allowing you to directly add mix-ins like chocolate chips, nuts, or fruit during the freezing process without interrupting operation. This is a significant convenience for creating customized flavors. While both models produce delicious ice cream, sorbet, and frozen yogurt, the ICE-45’s added functionality makes it a versatile option for those who enjoy experimenting with different combinations.
Accessing Online Manuals and Support
Need assistance with your Cuisinart ice cream maker? The official Cuisinart website (www.cuisinart.com) is your primary resource for downloadable instruction and recipe booklets. You can easily find the manual specific to your model – ICE-20, ICE-45, or others – in PDF format. Manualzz and other online repositories also host a wide range of Cuisinart ice cream maker manuals for free access.
Beyond manuals, Cuisinart’s website offers comprehensive support, including FAQs, troubleshooting guides, and contact information for customer service. Many online forums and communities dedicated to cooking and appliances also provide valuable user-to-user support and advice. Don’t hesitate to leverage these resources to ensure a smooth and enjoyable ice cream-making experience!
Nutritional Information (Example Recipes)
Enjoying homemade ice cream doesn’t mean sacrificing health awareness! Here’s a glimpse into the nutritional content of some example recipes compatible with your Cuisinart maker. A serving of chocolate sauce, as featured on page 12 of some manuals, contains approximately 330 calories, with 30g of fat (15g saturated), 14g of carbohydrates, and 3g of protein.
Alternatively, a basic ice cream recipe yields around 222 calories per serving, comprising 73 calories from fat (18g total, 11g saturated), 13g of carbohydrates, and 2g of protein. Sodium content varies, typically around 45-58mg. Remember these are estimates; nutritional values will change based on ingredient choices and portion sizes.